
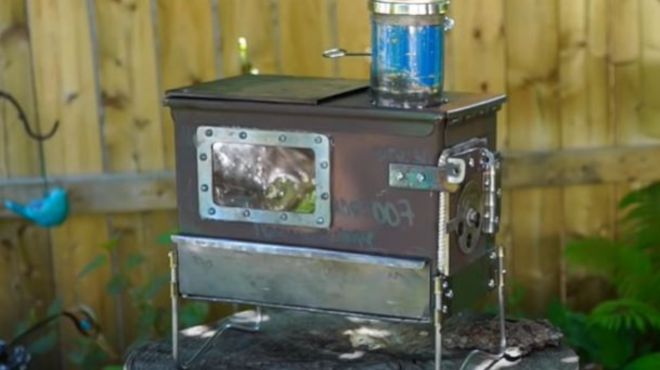
You can whip up a nifty portable wood stove in no time with a simple ammo can and basic hardware store parts. This compact stove is perfect for camping or prepping needs.
Unlike messy and sometimes dangerous campfires that risk damaging trails, this stove contains the flames to safely provide heat and cook food. Its modular design packs neatly yet transforms in minutes to let you bake, grill, or simmer whatever you’d like. Just pop it open, toss in some wood, sticks or pellets and you’ve got a sturdy off-grid cooking solution.
The best part is that it requires no technical skills to assemble. All it takes is an ammo can as the base, some common parts like titanium piping, BBQ grates and metal sheeting, and tools you likely already own like a drill and hacksaw. Following a straightforward process, you’ll soon have a high-powered stove for heating and cooking tasks. Plus its portable size is perfect for preppers and campers needing a reliable way to stay fueled on the go.
Let’s get started building your own efficient portable wood stove!
Required Materials
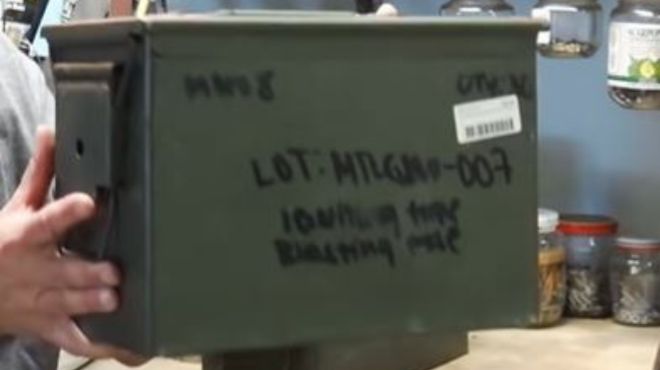
Let’s start gathering what you’ll need to put this portable powerhouse together. The ammo box forms the main cooker chamber. Be sure to grab a fat 50 caliber one, which is a bit more spacious to hold the stove interior.
Then you’ll need some light and sturdy titanium piping, roughly a foot long, for the exhaust chimney. This lets smoke exit while cooking up a storm inside the box. Pop off the lid of an old grill or smoker to source some handy metal plates. These will let you fabricate baffle controls and a front loading door.

For tools, a small grinder or rotary tool helps precisely cut openings in the ammo case. A blow torch assists with any metal bending. Standard items like a hacksaw, drill and drill press allow exact drilling and coupling the chimney mounts. And don’t forget protective equipment like gloves and goggles when fabricating.
Most of the items should be easily obtainable or found in your garage or toolkit. Now comes the fun part of assembling everything into a firebox that’s equipped to cook up anything you crave! Just be sure to gather all needed materials first so construction goes smoothly once you begin. It may help making a checklist so no parts are overlooked. Then let’s start crafting!
1. Constructing Your Portable Stove
Now for the fun part: let’s start building your ammo can stove! The first step is safety first. Make sure to wear protective gloves, eyewear and clothing before handling metal components. Work only in ventilated areas when cutting or drilling materials.
Okay, with safety prep complete, grab your ammo can and let’s start customizing. You’ll first want to remove all hardware and components from the can’s lid so just the hollow metal lid remains. This creates space to add chimney piping without obstruction. Use a power drill and appropriate bit size to detach any hinges, brackets and existing fixtures.
Place removed lid pieces safely aside for later project use if desired. Thoroughly clean out any debris or gunpowder residue until only the bare ammo box and lid remain. This clears space for installing the combustion chamber and other interior stove components going forward.
With your blank canvas box prepped, the real alterations can now start! There’s great flexibility on design elements at this stage. Just follow general dimensions so piping and plates fit snugly. Measure carefully before cutting and drilling to ensure everything aligns properly.
Then bring your dream portable stove to life! The ammo case provides a perfect foundation to craft a fully-functional firebox.
2. Install Stove Pipe Collars
Let’s continue constructing the stove by installing the chimney piping. Measure and mark where the exhaust will penetrate the ammo can’s top. Then drill guide holes for your titanium stove pipe pieces. Generally placing near the lid’s center provides enough support.
Use protective equipment when cutting any metal. Make circular openings just wide enough to accept the pipe diameters. File away burrs then test inserting the chimney lengths in the penetration spots. They should have a snug fit.
Next, attach corresponding stove pipe collars both inside and outside the ammo lid. These firm up and weatherproof the joined chimney conduits. Apply high-temperature silicone sealant liberally when fastening the collars. This seals any gaps plus allows safely detaching the piping if needed.
Consider adding a cover plate or rain guard at the exterior collar opening. This prevents weather elements from entering but won’t obstruct drafting smoke. For extra stability, place thin metal mesh around the stove pipe interiors to sturdy the clay dauber combustion chamber you’ll add next.
Once your chimney run looks aligned and secured, do a quick test fitting with the ammo lid. Make any last adjustments to ensure the lid seats firmly with pipes protruding vertically. Get your epoxy and sealants ready for attaching the baffles, air inlets and other interior mods that really convert your box into a roaring stove!
3. Add Damper and Dividers
The real efficiency comes from smartly designing the internal combustion layout. This controls the fire’s air intake and directs flows for optimum burns.
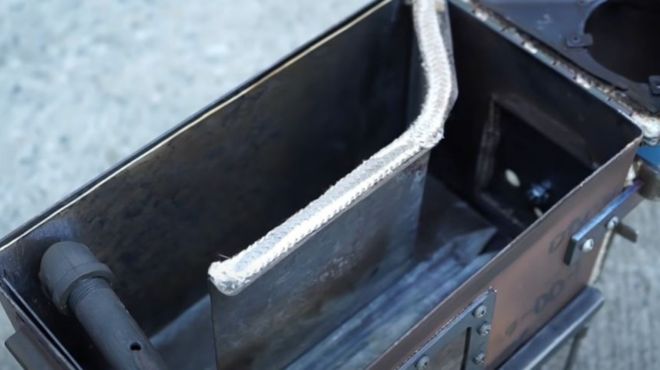
Begin by fabricating then fitting sheet metal baffles and chamber dividers inside the ammo can. Use a marker to diagram desired placements before drilling attachment holes. Strategically position the baffles to section the fuel chamber. This isolates the fire for cleaner, hotter burning by restricting outside air entry.
Then add an adjustable damper valve at the chamber floor. This regulates primary airflow to either choke oxygen during startup or feed air to fuel the flames. The damper gives burn control for optimal efficiency tailored to your needs.
Carefully position interior chamber plates to create separation zones enabling staged combustion. Connect to the existing stove pipe airflow using small steel elbow joints or custom snorkel tubing. Get creative on designing smart burn paths!
These thoughtful chamber addons turbocharge performance. The fire now burns in phases across each section, while air flows route exhaust. It’s rocket-stove technology shrunk for mobility! Be sure to test air intakes frequently by lighting test fires at each stage of fabrication. Then enjoy the fruits of your labor with high-efficiency flames for off-grid cooking and heating!
4. Fabricate and Attach Side Door
No stove is complete without a way to stoke the fire! Let’s cut a loading door to easily feed fuel into the chamber.
Start by measuring then tracing the door outline on the ammo box side. Center it near the base for best fire access. Use protective gear while cutting the opening with a grinding tool. File any rough edges smooth.
Fabricate the actual swinging door from those leftover BBQ grill plates, using hinges cut from the ammo can lid. Cut a section large enough to cover the opening. Use bolts, high-temp sealant and corner clamps when fastening to enable detaching later.
Attach hinges along one long side so the door can swing outward. Include a handle knob for safe opening and closing once the stove is hot.
Ensure the door seals tightly when latched to prevent air leaks. Test adjusting the internal damper plate to regulate oxygen intake through the door opening.
Now you have an easy access portal to tend the blaze by quickly adding more wood, pellets or other fuel! Close the opening once the fire gets rolling and use the chimney damper to fine tune heat output.
The loading door empowers safely feeding the burner longer. Carefully open or close as needed between meals to revive the flames. Then enjoy hours more outdoor fun with your portable powerhouse continuously supplying heat and grub!
5. Add Secondary Burn System
Here’s a pro technique to make your stove ultra efficient: adding a secondary burn system. This uses exiting heat to reburn fuel exhaust for extra energy before it escapes up the chimney.
Install an additional narrow chamber above the main firebox, lined with steel mesh and perforated tubes. Connect this to the existing stove pipe exhaust pathway. It should ignite from the rising smoke heat.
As hot gases rise after the initial burn, this top chamber reignites the emissions for secondary combustion. By burning the exhaust twice, no volatile compounds or smoke gets wasted.
You can incorporate fancy components like rumford firebricks or catalytic honeycombConvertors to further eat smoke particles. But basic steel mesh works fairly well. The key is keeping the secondary chamber smaller than the primary box below it.
Use interior baffles to funnel exiting exhaust gases into this upper chamber before reaching the chimney. Essentially the fuel gets burned twice, making your stove far more efficient!
The result is ultra-clean burns that re-use escaping heat, while minimizing emission particles up the pipe. This both lowers fuel consumption and reduces visible smoke. Plus secondary re-burning generates extra heat to cook meals faster. It’s a win-win!
6. Install Gravity-fed Hopper
Manually feeding fuel into a hot stove can be tedious. For easier loading, let’s add a handy hopper that automatically drops pellets using gravity.
Use thin sheet metal to form a sloped funnel that mounts over the stove’s side opening. Size it to hold sufficient pellets while refueling less often. Add seam rivets when shaping the slope walls to create the hopper.
Make sure to include a closing slide gate at the hopper’s bottom opening where pellets dispense. This allows regulating pellet flow into the chamber. You can also attach a side handle to easily rotate and dump in pellets during refills.
Mount the hopper chamber at a raised height so gravity naturally pulls the wood pellets downward when the gate is open. Angle the bottom to center over the combustion chamber door.
Now you can pre-load the entire hopper before starting your trip. The weight of the pellets slowly dispenses more fuel as needed to feed the fire. Close the gate when cooking is complete.
The elevated hopper makes burning super convenient by automatically stoking the blaze over long periods. Have a fun and hands-free outdoor cooking experience!
7. Use Tent Stakes for Legs and Airflow
The final fabrication step elevates your stove for safer operation and airflow. Use thick metal tent stakes to create detachable legs.
Decide how much ground clearance needed under the stove to suit campsite surfaces. Cut stakes to appropriate heights that will firmly support the stove’s weight when hammered into dirt.
Attach using hinge brackets allowing folding the legs flat during transport. Screw the brackets into the ammo can’s rear and front bottom edges. Then test clipping in the rod legs to ensure a sturdy upright stand.
Not only do the stakes elevate the box off combustible surfaces, they also promote needed ventilation from underneath. This feeds extra cooling air to the interior chamber to regulate burning temperatures.
For extra airflow you can add more louvred vents along the ammo case sides or lid. Cut mini slits using snips then bend back the metal to angled ports. Further tune oxygen flow to nurture the fire with ideal drafts.
There you have it! A fully-standing portable stove ready for off-grid cooking and heating. No need to kneel next to ground fires or hover over makeshift burners. Just ignite the fuel load through the hopper and monitor as needed from a comfortable standing position thanks to your specialized stove legs. Happy camping!
Added Features
Mica Glass Window to See Fire
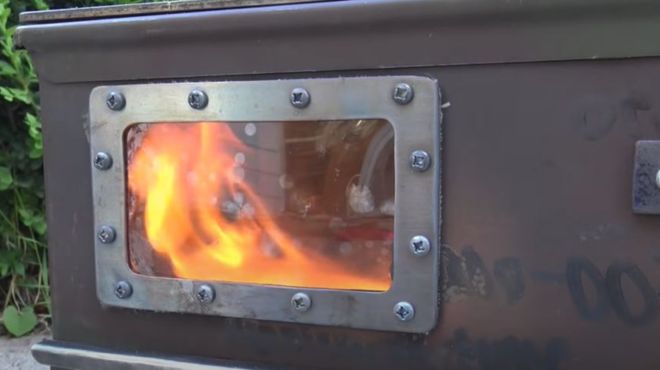
What’s a flame without getting to watch it dance? Add a final touch of transparency by installing a heat-safe viewing window. This lets you visually inspect burns.
Use a glass cutter to carefully score then snap off a rectangle section of mica sheet. Mica withstands high temperatures to remain intact when exposed to direct flames. Cut an appropriately sized opening in the ammo box side and attach the mica pane using high-temp caulk or cement.
Now your roaring fire glows in full sight! The transparent window offers both safety to check on fuels and a bit of entertainment from the light show inside.
Portable Titanium Stove Pipe
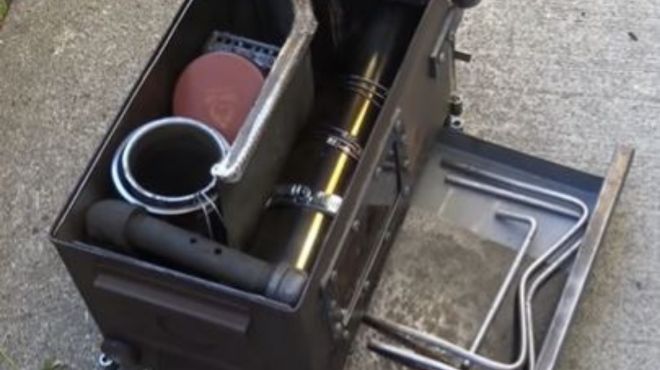
For true portability, ensure your stainless steel chimney piping can disconnect into compact segments. Consider a telescoping pipe that collapses down in size. Then the entire stove apparatus packs neatly back into the ammo can for mobile use.
After all the cutting, drilling and fabricating, stand back and admire your rugged DIY stove handiwork! What once housed bullets now fuels your next adventure with independent cooking abilities.
Conclusion
This build allows comfortably preparing meals remotely thanks to wise use of waste items – an old ammo case transformed into a convection oven able to bake, slow-cook, grill and heat using natural materials in its dual burn chambers. Lightweight and transportable, yet robust enough to weather harsh elements outdoors.
Follow the steps to create your own economical stove stuffed with efficiency features rivaling expensive commercial rigs. The modular construction enables modifying to your unique needs and fuel sources while packing conveniently to deploy anywhere.
Scrap metal and hardware parts repurposed with mindful designing results in a powerhouse unit able to boil water in minutes or sustain low smolders all night when outfitted with the right dampers and hoppers. Sturdy legs then let it serve faithfully next to tents, campers or disaster shelters when electricity fails.
So don’t wait to start thriving off-grid using this adaptable ammo box stove – bring precision cooking anywhere adventures take you!


