
This DIY project outlines the process for constructing an outdoor wood boiler barrel and connecting it to radiators in order to cheaply and effectively warm a small detached garage or workshop. By using mostly salvaged materials like an old barrel, some copper pipes, and a junkyard car radiator, you can create a closed-loop water heating system that efficiently transfers heat from a wood fire into your workspace.
Read on to learn step-by-step how to set up this ingenious backyard build heating system using an upcycled hot water barrel boiler paired with an automotive radiator. Let’s get fired up!
1. Preparing the Barrel
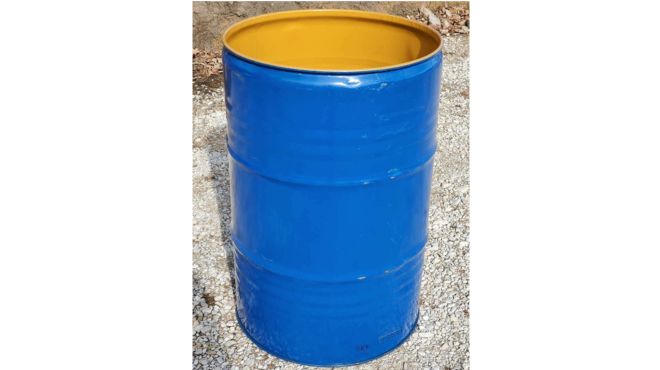
The first step in constructing your backyard garage heating system is prepping the steel drum that will become the hot water barrel boiler. You’ll need a food-safe 55 gallon steel barrel cleaned out thoroughly. Make sure no toxic residues linger inside before proceeding.
Use a barrel stove kit guide to measure and cut a properly sized front opening door into the barrel. This barrel door allows feeding wood fuel into the boiler barrel to keep it burning. Trace the dimensions with chalk or tape before taking a jigsaw to the steel exterior. Remember to wear gloves and safety goggles.
Once the barrel entrance is cut, smooth any sharp steel edges with an abrasive disc sander or grinder tool to prevent cuts and scrapes when feeding wood into the active boiler. File down snags and rivets inside the barrel as well for a smooth surface. This vital prep step removes safety hazards both inside and out.
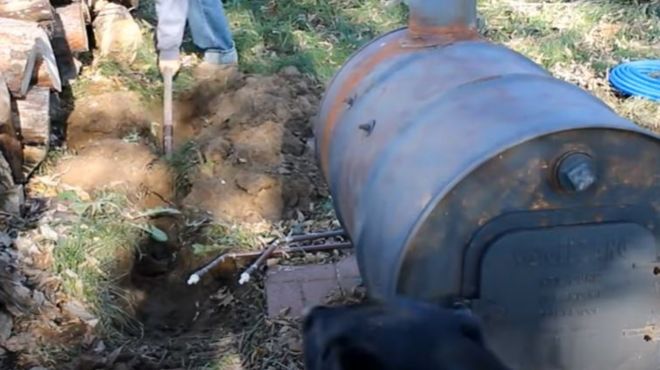
The prepped barrel should now have a cleanly cut hole, no leaks, and smooth edges around the new door. Next up, we’ll use steel legs to get it up off the ground before converting it into a water heating boiler. Safety first!
2. Assembling the Stove
Now that a front-loading door has been cut, we need to complete the basic wood-burning stove assembly so the barrel can stand upright and vent properly.
First, weld, bolt or rivet on four steel legs evenly around the circumference of the barrel. Measure their placement precisely to keep the barrel level. Legs allow airflow underneath and lift the stove off the ground for safety and stability.
Next, attach a steel flue collar pipe and damper to the top of the barrel. This allows smoke and heat to vent while controlling the airflow. The damper regulates temperature by limiting oxygen inside the hot barrel during the burning process. Close it to intensify and retain heat.
The damper and chimney flue pipe control rate of burn and direct excess heat and smoke vertically out the top once the fire is properly raging inside the upright barrel stove. Precise installation is key to tuning temperature output.
Now the upright barrel can be loaded with fuel and lit safely. The final vital step is converting it to a hot water heater by installing copper coils inside to capture heat and transport it to the garage.
3. Converting into Water Heater
The most important step for harnessing the heat of the wood-burning barrel stove is installing the copper tubing coils that will function as a water heating system.
Begin by measuring and drilling holes to thread several sturdy threaded steel rods horizontally across the interior span of the barrel. Space and place them strategically from side to side so there is about 12 inches between them. These rods will securely hold the copper coil tubing suspended inside the barrel.
Then proceed to carefully bend shape a 30 foot length of half-inch copper tubing into a continuous coil that can wrap around the interior of the barrel while being held by the threaded rods. Keep the coil compact by shaping it cylindrical rather than conical. This maximizes surface area exposed to the heat source. This coiled pipe serves as the heat exchanger.
At the two ends of the copper coil, attach pipes or hoses threaded through holes cut near the bottom of the barrel. These pipes will transport the heated water out of the barrel and into the garage via an underground trench.
Once the copper coil is installed, the wood-burning stove barrel has been successfully converted into a hot water boiler heater! Next we will enhance heat capture before connecting up the pipes to the separate garage.
4. Enhancing Heat Transfer
To further improve heating efficiency, an additional external loop of copper pipe can be added to preheat the water right before it enters the hot barrel.
Wrap a 10 foot length of half-inch copper tubing tightly around the lower exterior of the upright barrel stove, securing it with hose clamps. Insulate this exterior tubing with fiberglass or foam.
Connect this external copper loop to the water supply pipes, so that incoming cool water passes first through this exterior heating loop before entering the hot barrel. This preheats the water closer to boil temperatures for more efficient heat transfer inside the barrel.
5. Connecting to the Garage
Now to transport all that captured heat directly into the garage! This requires insulating all connecting pipes and trenching them safely underground from the backyard barrel stove to the detached garage.
Wrap all water supply and return pipes with ample foam pipe insulation to prevent heat loss over the pipe run. Secure the insulation tightly. Leave no surface unprotected.
Dig a 1 foot deep covered trench extending from the outlet pipes on the barrel water heater to enter the garage at the foundation. Provide enough slack and maneuver space when burying piping.
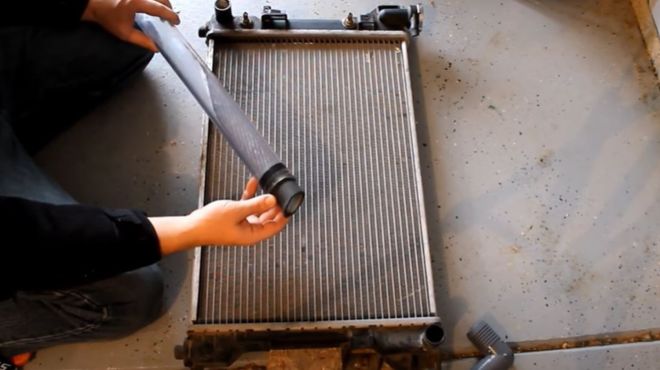
Inside the garage, secure the supply and return pipes to an automobile radiator, which will serve as the heat exchange and distribution system because of its high surface area. As heated water from the barrel passes through the radiator, it emits warmth into the garage air.
The hard work of transporting heat energy from point A to B is complete! Now to complete the water flow loops and start warming that workshop!
6. Water Circulation System
The previous segments established how to pipe hot water from the backyard barrel boiler to the garage, but how does the water keep flowing? The solution is an electric submersible pump to power circulation in a closed loop system.
Place a bucket filled with water next to the barrel stove and immerse a small submersible pump wired to an extension cord outlet. Use hose clamps and adapters to connect the pump to the insulated underground pipes carrying hot water out to the distant garage space.
Then attach a return pipe from the other end of the garage radiator, forming a complete loop to channel cooled water back to the pump bucket to repeat the cycle. This forms a closed circulation system requiring no direct water replacement once filled.
For winter use, add plenty of RV antifreeze to the water in the system to lower its freezing point well below any temperatures the above ground external piping may encounter. This also enhances heat retention on those long pipe runs.
Turn the pump on low setting and it will constantly pull heated barrel water through the radiator into the garage, returning the cooled fluid to the stove in a continual convection current. Set it and forget it!
7. Distributing Warm Air
The previous segments covered capturing heat energy in hot water and transporting it into the garage via radiators. But how do we get that warmth to permeate the garage? The answer is fans.
Position a large drum fan or other blowing appliance behind the radiator, angled to point the output directly out into the garage workspace. The fan will actively circulate the passively heated air from the radiator surface area out into the environment.
As the pump circulates the hot barrel water through the radiator, the fan continually blows the emitted warmth outward in a spreading pattern, raising temperatures in the garage. Strategic fan placement focuses and concentrates heat distribution.
The ideal arrangement is the radiator positioned central to the garage, with fan just behind it, blowing perpendicular to the garage door opening. This arrangement pushes heat toward the cooler vehicles and unfinished outer walls, balancing temperatures.
With the fan actively circulating amplified warmth from the radiator throughout the garage interior, the once drafty workspace is now flooded with comfortable heat for winter hobby time!
Conclusion
The process of heating a garage with a backyard wood burning stove and car radiator requires creativity, some metalworking skills, and time to construct—but the payoff is a comfortably warm shop space for little cost.
In summary constructing this unique heating system involves:
- Cleaning and preparing a barrel into a wood stove
- Installing copper tubing coils inside it to capture heat
- Trenching pipes to carry hot water to space needing warmth
- Connecting pipes to a radiator heat distributor
- Powering a circulation pump in a closed loop
- Blowing emitted heat actively into the environment
The end result is an affordable and ingeniously effective means of heating your garage or workspace using scrap materials and the natural power of fire. The warmth billowing out of that old car radiator will keep you toasty all winter long as you pursue your projects and hobbies even in the coldest months!
With some upfront effort, you can save huge on heating bills and still have access to your beloved workshop space year-round. This simple backyard build heating system helps turn garages green by recycling materials and tapping into renewable free fuel.


